Difference between revisions of "Configure AUX to Console Relay"
From Teknologisk videncenter
m (→Configuration) |
m (→Components Used) |
||
| Line 4: | Line 4: | ||
*1841 With AUX port | *1841 With AUX port | ||
*SRX240 with Console port | *SRX240 with Console port | ||
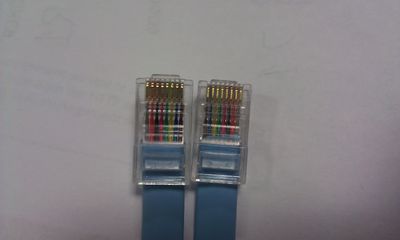
| + | *RJ45-RJ45 Rollover Cable | ||
*Putty | *Putty | ||
| + | |||
=Setup= | =Setup= | ||
The 1841 router is connected to the network and have an IP address. The AUX port on the router is connected to the console port of the SRX240 with a blue Cisco RJ45-RJ45 Rollover cable. | The 1841 router is connected to the network and have an IP address. The AUX port on the router is connected to the console port of the SRX240 with a blue Cisco RJ45-RJ45 Rollover cable. | ||
Latest revision as of 09:10, 8 March 2012
Prerequisites
Components Used
- 1841 With AUX port
- SRX240 with Console port
- RJ45-RJ45 Rollover Cable
- Putty
Setup
The 1841 router is connected to the network and have an IP address. The AUX port on the router is connected to the console port of the SRX240 with a blue Cisco RJ45-RJ45 Rollover cable.
Configuration
Router><input>enable</input>
Router#<input>configure terminal</input>
Router(config)#<input>line aux 0</input>
Router(config-line)#<input>modem InOut</input>
Router(config-line)#<input>password cisco</input>
Router(config-line)#<input>login</input>
Router(config-line)#<input>transport input all</input>
The telnet port on the router is 2000+line number. We find the line number with:
Router#<input>show line</input>
   Tty Line Typ     Tx/Rx    A Modem  Roty AccO AccI  Uses  Noise Overruns  Int
*     0    0 CTY              -    -      -    -    -     2      0    0/0      -
*     <notice>1</notice>    1 AUX   9600/9600  -    -      -    -    -     2      0    0/0      -
*   194  194 VTY              -    -      -    -    -     4      0    0/0      -
Now test it by telnetting to an ip address on the router and use port 2001. To exit press <CTRL><SHIFT>6 then X
